Facing Ratio shader node in Maya (REPOST)
I originally presented this in Fall 2004 as part of the UCBUGG Masterclass series. It was previously published on ucbugg.berkeley.edu.
It’s often important to know what’s behind the scenes. That’s why, with Maya, you should always demand the truth. If you’re in a relationship, for example, it’s always good to know what’s going on in your significant other’s life. That way, there won’t be any unpleasant surprises. And just like relationships, knowing how Maya works under the hood helps. ;)
Maya is a node-based system. When you tell Maya, “I want a sphere,” it’ll create several nodes holding different characteristics that altogether combine to form the sphere you see in the viewport. You can manipulate the attributes of each node; these attributes affect how the sphere looks in the end.
In this tutorial, we’ll play with nodes hands-on in the Hypershade, a window in which shaders are constructed. In a later Masterclass, Ben will show you how to do shaders in Renderman.
You’ll also learn how to use the Facing Ratio and Surface Luminance attributes of the Sampler Info node for these applications:
- an X-ray effect
- an Electron Micrograph effect
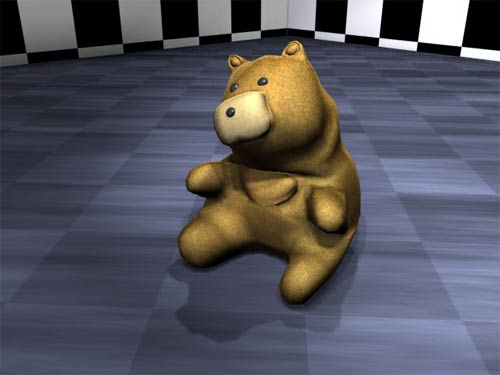
- Velvet
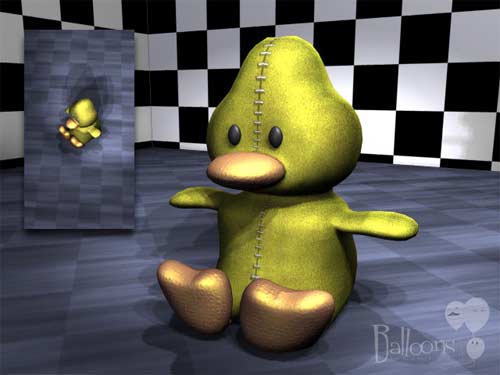
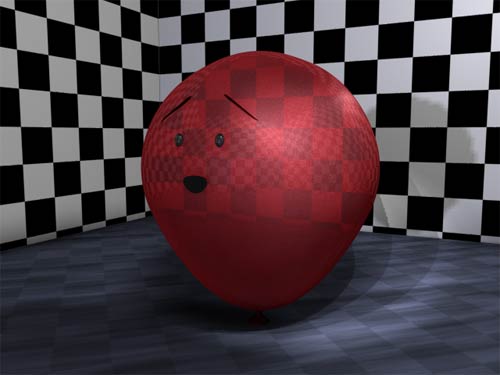
- Fresnel Effect in Balloons
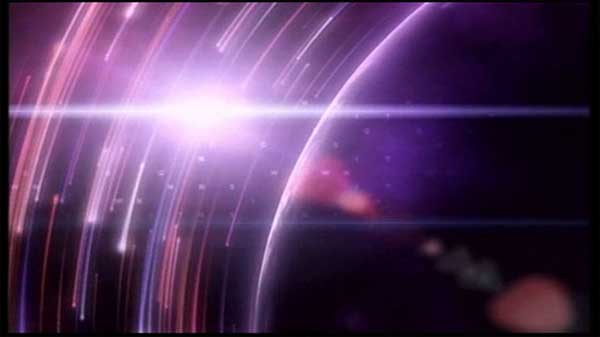
- Rim glows on Jellyfish and Planets
- Toon shading
- Infrared Vision
- Some other effects
Facing Ratio
In computer graphics, raycasting is a technique used as part of raytracing. We shoot rays out from our camera and into the scene, and these rays must hit an object. When this hit occurs, the computer knows that it must paint that part of an object. If there is no hit, then the computer doesn’t need to paint it at all. It’s like using a bow and arrow in the dark. If you shoot an arrow and you don’t hear a sound, you know that nothing’s there. But if you shoot the arrow and you hear a high-pitched scream, you know that something’sthere.
But a computer needs to launch more than one or two arrows. It needs to launch an arrow for each pixel on your screen to determine whether it needs to draw something in it or not. (If you think I should put a diagram here to clarify things, add a comment to this page. :))
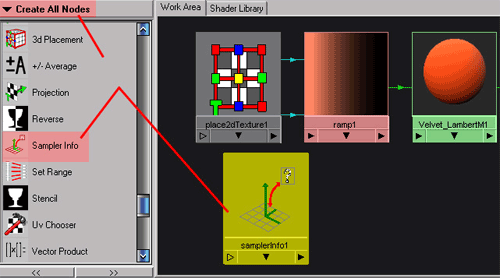
The Sampler Info node holds information about an object, hit by this ray, in each pixel and can report information such as the camera’s X Y Z value at a point, the object’s X Y Z value, the normal of the object at the point, and the facing ratio of the object at a point.
Facing ratio first takes the point of the object and reports back its normal vector. Then it’ll take the dot product of this and the camera’s normal vector and return the absolute value of it all.
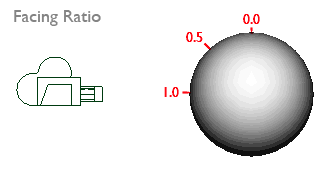
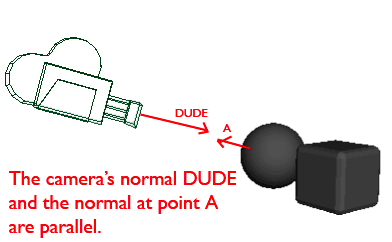
For example, the camera above shoots a ray at the ball straight-on and we find that the normals are parallel. The dot product of two parallel vectors is 1.0.
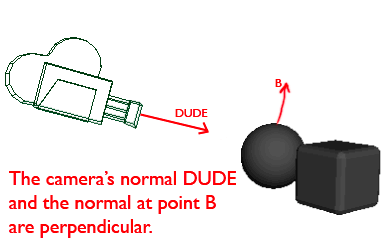
The normal at the top of the ball is perpendicular to that of the camera, so the dot product is 0.0. Facing Ratio returns this value.
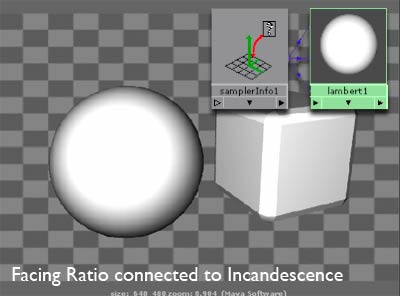
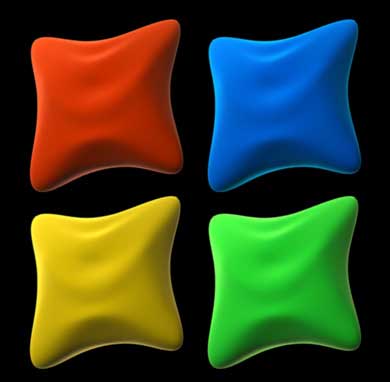
Qualitatively, if it’s straight-on, Facing Ratio will give you a value of 1. As a surface becomes more and more slanted, the Facing Ratio will become 0. For example, I connected Facing Ratio to the Incandescence channel of the objects’ materials here. Notice how it’s white in places that are facing me, while it becomes darker towards the sides of the objects.
In this example, I’ve connected the Facing Ratio to the material’s transparency. You can see through the objects whenever it faces us, but as it comes towards the sides, it gets more opaque. Can you think of places where you’ve seen a similar effect in real life?
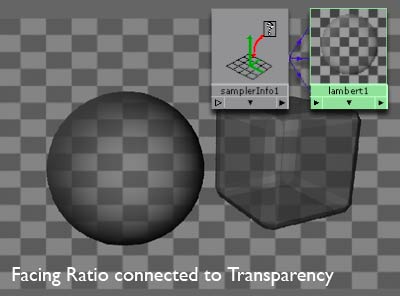
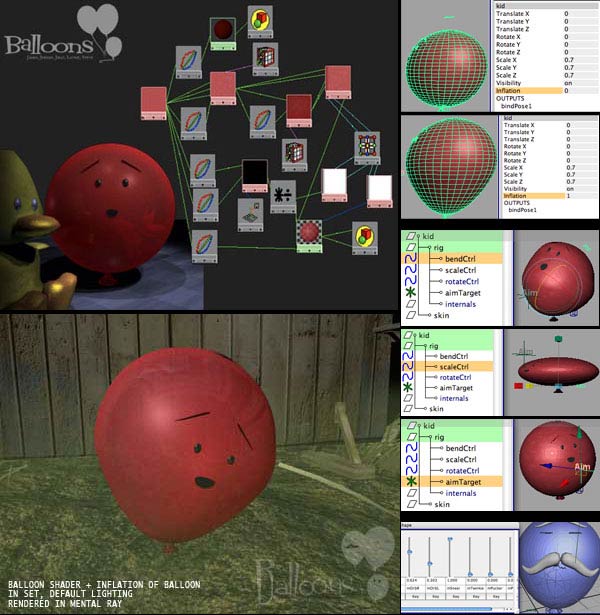
In physics, the index of reflectivity is stronger if you’re viewing an object towards an angle, rather than straight-on. If you look at a glass straight-on, you don’t see much of a reflection. But if you look at it from an angle, there’s more of a reflection. In Maya, you can also connect Facing Ratio to the reflectivity of an object, thus controlling how reflective it is. I believe this is called the fresnel effect.
Surface Luminance
The Surface Luminance node is like the Facing Ratio attribute, except that areas fully lit by lights get a value of 1.0. Areas not lit at all get a value of 0.0.
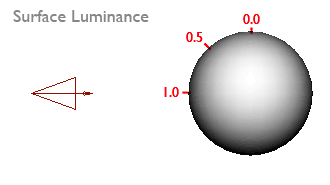
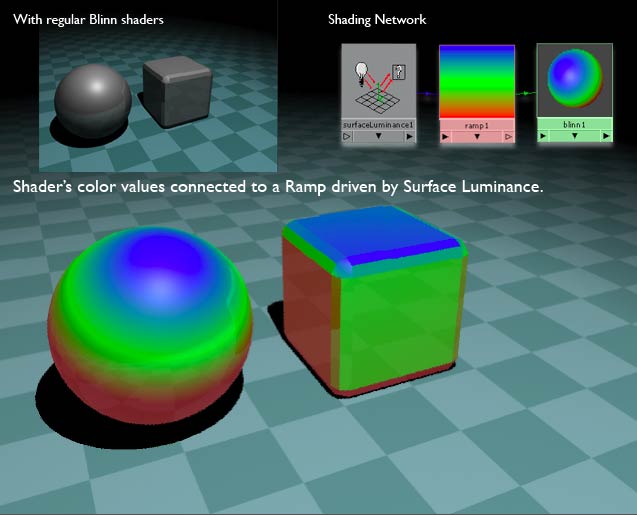
This makes it especially great since you can now control the look of an object based on how much light it receives. In this example, note that the top of the objects are brighter (the visual cues come from the shadows). If I connect a surfaceLuminance node to a ramp, then connect that ramp to a Blinn, it’ll produce a different picture.
Applications
There are many creative effects you can make with these new shaders.
the X-ray effect
the Electron Micrograph effect
You can fake the look of an electron micrograph with clever use of a Facing Ratio-based surface shader, a nice bump map, and use of depth-of-field. Electron micrographs are extremely up-close captures of small particles, like viruses, blood cells, and bacterium, and are primarily used in biology. Because they are based on electron emission, these types of micrographs are monochrome. In biology textbooks, artists run it through a fake coloring process.
This was adapted from Niklas Anderson’s tutorial “Virii” (http://www.niklasindustries.com/tutorials/tut_virus.htm ), which uses Lightwave 3D and also has a similar ramp function called Gradient.
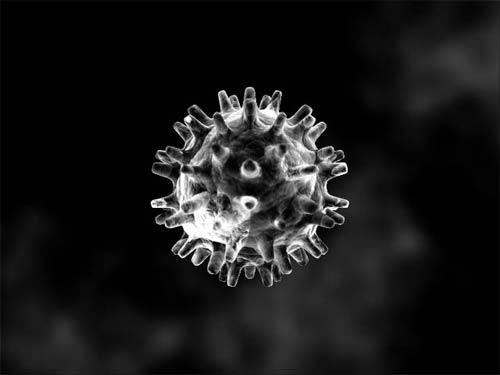
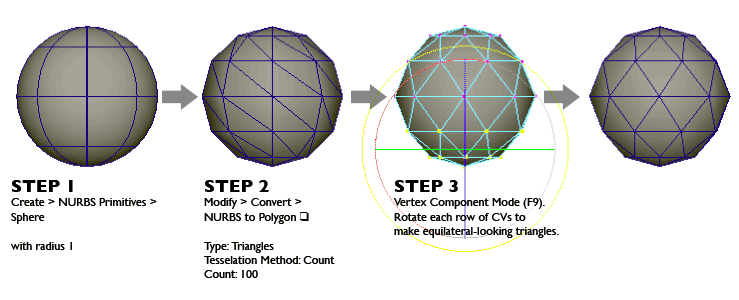
- Create a NURBS sphere (Create > NURBS Primitives > Sphere) with all default settings, especially the radius of 1 bit.
- Convert it to polygons with triangular tesselation (Modify > Convert > NURBS to Polygon â*). Set Type to *Triangles, Tesselation Method to Count, and Count to 100.
- Enter Vertex Component Mode (F9). This is slightly tricky, but rotate (E) each row of CVs in your sphere so that your sphere has equliateral triangles. This just makes the shape look nicer.
- Make sure Polygons > Tool Options > Keep Faces Together is unchecked. This matters when we extrude faces later; this allows newly-extruded faces to keep their own edges separate from those of adjacent faces.
- Enter Face Component Mode (F10) and select all the faces.
- Extrude all of the faces with Edit Polygons > Extrude Face. It’s hard for me to explain what extruding actually is; well, it duplicates the face but the new faces’ vertices are connected with the original faces’ vertices.
_Better that you do it than me try to explain. ;) This will active the Show Manipulator handles; with these, uniformly scale so that the triangles are almost half as small as the original. (Or, if you want to strictly follow me, set Local Scale X, Local Scale Y, and Local Scale Z all to 0.55.)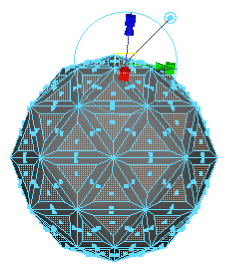
- Hit G to repeat our last command, Extrude Face (rather than have to go to the menu and hunt for the command again). This time, use the Z translate handle to move the faces out of the sphere a little, and uniformly scale it so that it’s a little small. (Or, if you want to strictly follow me, set Local Scale X, Local Scale Y, and Local Scale Z all to 0.633 and Local Translate Z to 0.227.)
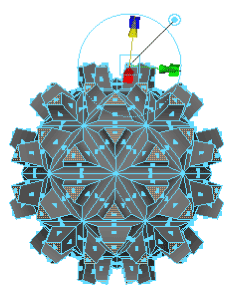
- Hit G to repeat our last command, Extrude Face (rather than have to go to the menu and hunt for the command again). For the last time, use the Z translate handle to move the faces out of the sphere a little, and uniformly scale it so that it’s half as small, to form a small cap on top of our previous shape. (Or, if you want to strictly follow me, set Local Scale X, Local Scale Y, and Local Scale Zall to 0.683 and Local Translate Z to 0.035.)
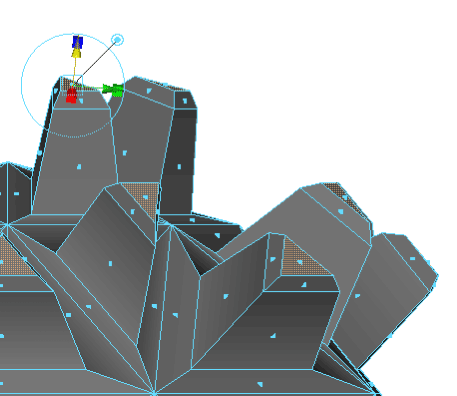
- Go back to Object mode (F8).
- Smooth it so that we can get a curvy, high-poly mesh. (Polygons > Smooth)
- Enter the Hypershade (Window > Rendering Editors > Hypershade…). The Hypershade window is where we’ll construct the shader for this object.
(Unfortunately I never got to finish writing this tutorial; you can download the model and its completed shader here; you'll need at least Maya 6 to open this. Please contact me if this isn't the right file.)
Velvet
Based off Stephen Tubbrit’s tutorial
(use curtains from ac final report)
(use curtains from ac final report)
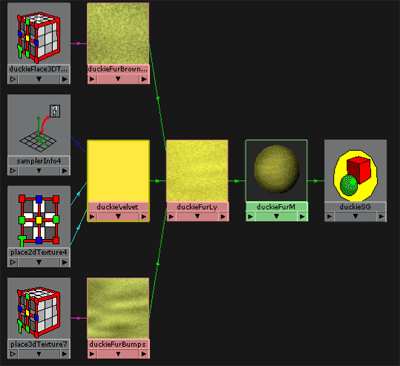
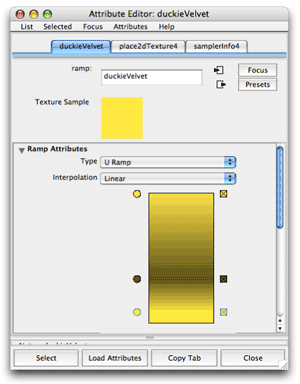
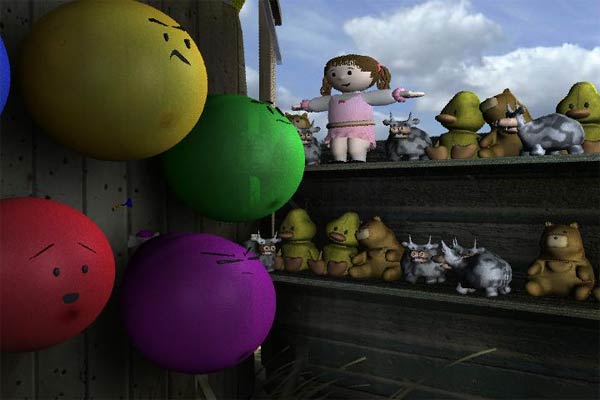
Fresnel Effect in Mirrors and Balloons
Rim glows
BBC Newsnight Scotland (www.tvroom.com)
Toon shading
The nodes we’ve been studying are wonderful for setting up a toon shader-like network. Take a look at the example below; I’ll try to walk through it.
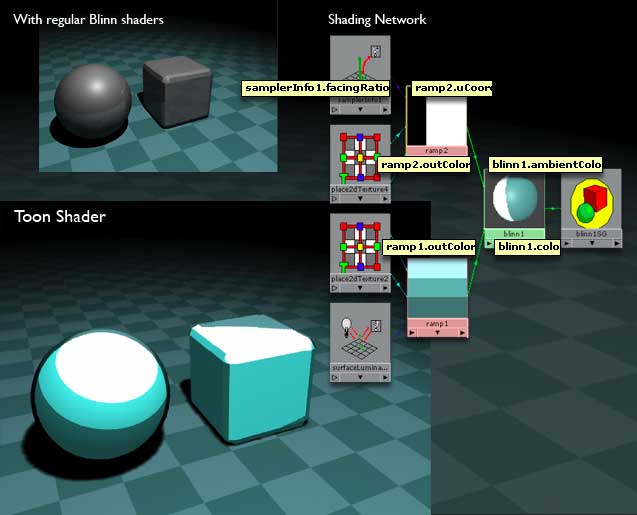
On the bottom, ramp1 is divided into three colors: bright to dark, with no smooth transitions. The surfaceLuminance node feeds intoramp1. For ramp1, an input value of 1 outputs the bright color, while an input value of 0 outputs the darker color. These feed into the material’s color.
On the top, ramp2 is divided into a thin black section and a larger white section. These feed into the material’s ambient color, and help darken or brighten the shape to make pseudo contours. The values of ramp2 are based on the facingRatio, so that the parts of the shape facing away from the viewer are considered outlines of the shape. (This works great for spherical, curvy shapes, but not low-poly models like the cube above.) In a way, the shader functions independently of lighting.
As an alternative, try using Maya’s built-in Ramp Shader, which compresses all of the facing ratio and surface luminance nodes into one easier-to-manage shader.
Unfortunately, the capacity to outline an object with Maya Software is limited. For example, the cube in the example doesn’t have an outline around it at all. Mental Ray fills the void by providing Contour shaders. To use the shader:
- Select your object’s existing material and open the Attribute Editor (Window > Attribute Editor or ctrl+A).
- Go to the shading group node by clicking the Output button.
- Go to Mental Ray > Contours and check the Enable Contour Rendering option. Play with the other parameters. :)
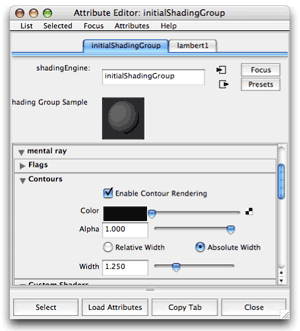
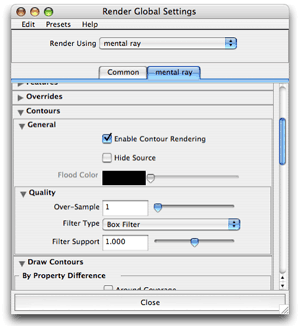
- In the Render Globals (Window > Rendering Editors > Render Globals…), change the renderer to Mental Ray.
- Click on the mental ray tab. Under Contours > General, enable Enable Contour Rendering.

没有评论:
发表评论